Intro
While working on getting better with Terraform I noticed there weren’t alot of examples of Kubernetes and AWS being provisioned at the same time. I forked the sample code provided by the Terraform project, and modularized it. From there I was able to add in a Kubernetes provider and patch in authentication. This allows us to create and provision Kubernetes architecture in AWS with a single command. To give a service to demonstrate, I’ve written a simple API endpoint in Golang and accompanying React front end. Break out your bingo card, there’s alot of buzz words coming your way.
Architecture Overview
Lets take a look at what all is acheived by our Terraform code.
This is what our ideal architecture looks like in AWS. Our React front end will be hosted in the S3 bucket.

Further more at the application layer, this is a diagram of Kubernetes architecture that will be implemented.
The master is provided by AWS with their EKS, and we bring the worker-nodes with the EC2 instances.
The GO-API is ran in single container pods distributed amongst the nodes.
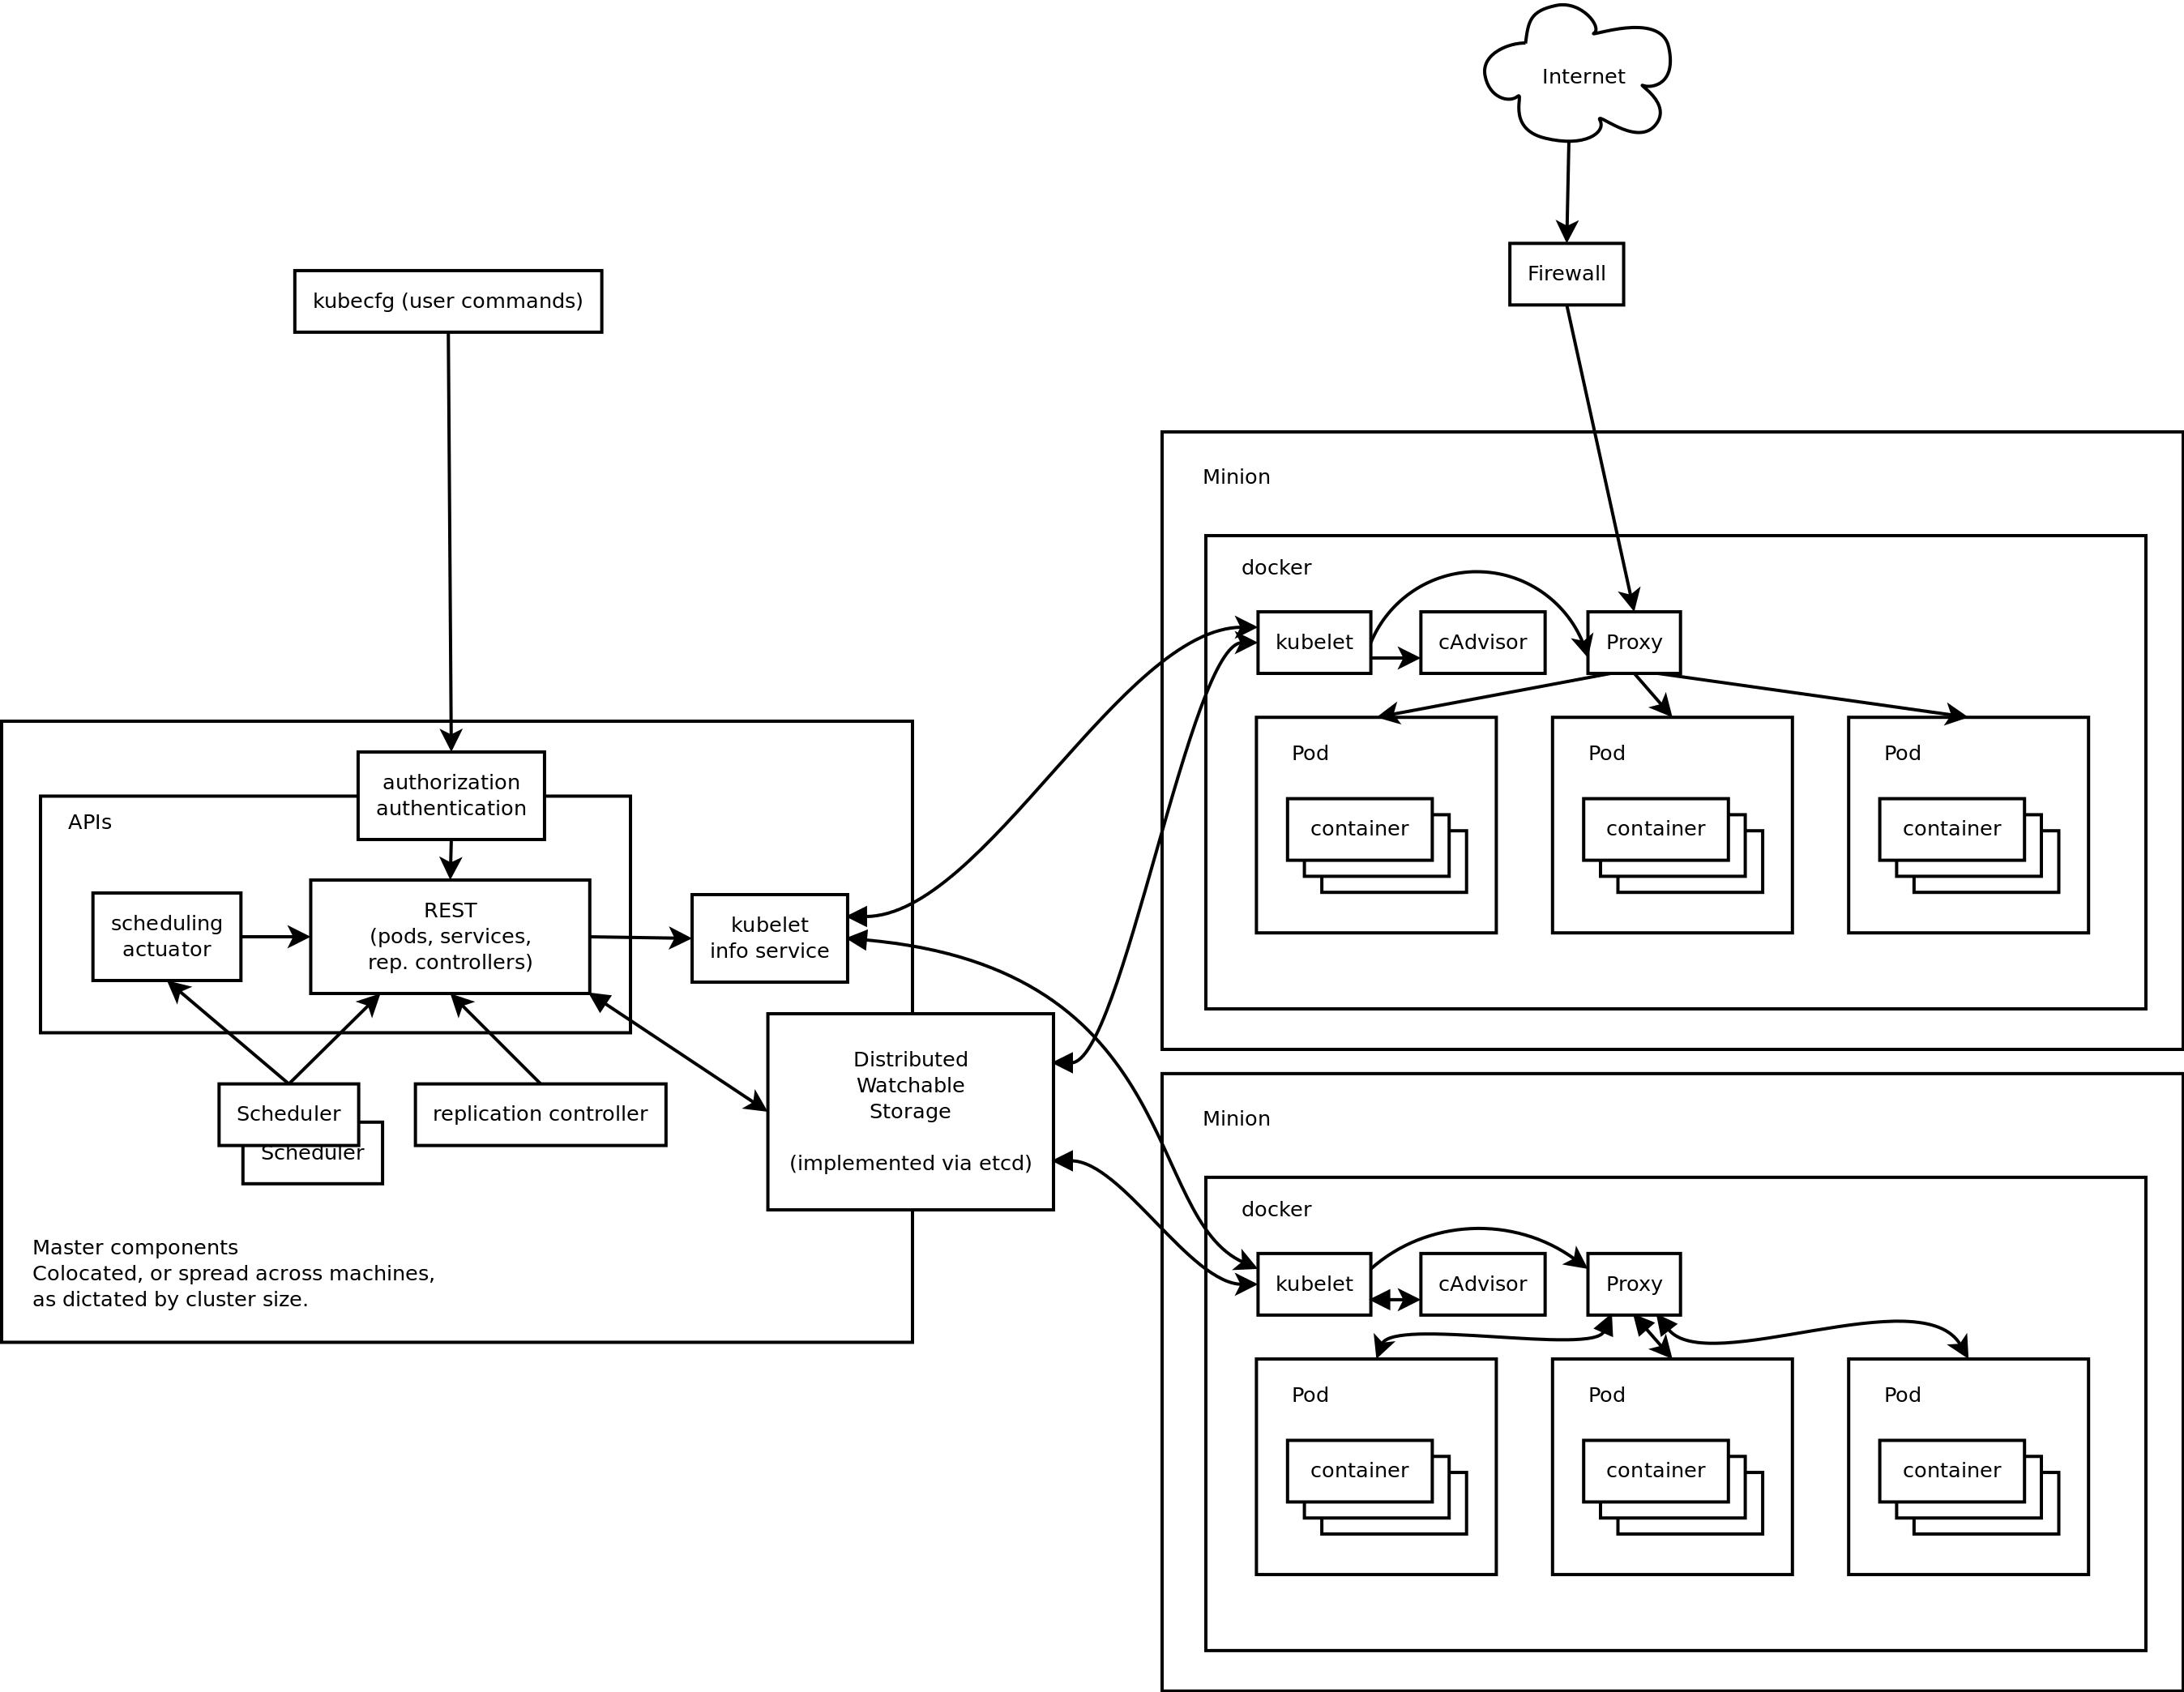
This distributed setup with Kubernetes steering the ship is what gives the backend of our application scalability, availability, and rolling upgrades.
Golang - API
Before we get to Terraforming our Kubernetes, we need something to run in our cluster.
This snippet shows our implementation of the endpoint by using the Gin Gonic framework.
|
|
From here it’s easy to compile it static with no dependencies, then load it into a Scratch Docker container.
This gives us a container image to put in our Pod spec that will then be loaded into our cluster. Once loaded, the API will respond to requests at /timestamp.
Having our backend in Golang means we can easiy put it in any Kubernetes cluster regardless of cloud provider, or compile it for an operating system if so choose.
React - Front end
React is a powerful Javascript library that we can employ to create single page applications. I used create-react-app as a launching point for our front end.
This pairs well with our Golang API in giving us a decoupled architecture, meaning we will have to craft a CORS (Cross Origin Resource Sharing) handshake for our requests.
|
|
The benefit of the decoupled architecture is that we can cleanly separate our front end functions and back end functions. Leaving the state in the user’s browser session can allow us to achieve an idempotent back end and architecture. This allows us to scale the back end easily during times of heavy traffic.
But this is the front end block, what about that? We can static compile our React and host it in an S3 bucket, and if we wanted to go further we could set it up behind a Cloudfront distribution. This would allow our application to be very quickly availble to people all over the world with low latency.
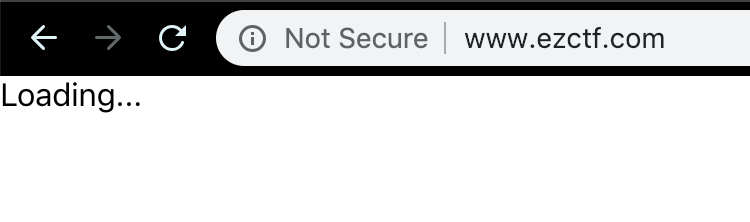
Compiling the above code and loading it into S3 shows the following when the API is unavailable.
Terraform, Finally
I used EKS Getting Started Guide Configuration as a starting point for getting the cluster up.
From there I modularized the code to make it easier to build upon.
After that I added the EKS-State file with a Kubernetes provisioner for our freshly made cluster.
This is the structure of our Terraform code.
.
├── main.tf
├── modules
│   ├── eks-cluster
│   │   └── main.tf
│   ├── eks-state
│   │   └── main.tf
│   ├── eks-worker-nodes
│   │   └── main.tf
│   ├── outputs
│   │   └── main.tf
│   ├── r53
│   │   └── main.tf
│   ├── s3-react
│   │   └── main.tf
│   ├── vpc
│   │   └── main.tf
│   └── workstation-external-ip
│       └── main.tf
└── variables.tf

9 directories, 10 files
Unfortunately Terraform doesnt have AWS kubernetes authentication wrapped in quite yet, so we have to use a local binary to circumvent this.
Basically this just means that we need more than the Terraform Binary for this, AWSCLI + AWS-IAM-Authenticator, but installing those is trivial.
|
|
With our token in line, our provider is now authorized to modify our Cluster.
The example EKS-Terraform has an output that you need to use kubectl to apply to cluster in order for the nodes to join.
Now that we’re using the Kubernetes provider we can simply use the kubernetes_config_map resource to join those worker nodes.
Next Terraform adds the following to the Kubernetes cluster:
- Namespace – Running in the default space is not advised
- Kube_config_map – Join our nodes to the cluster
- ServiceAccount – A service account on the cluster for our StatefulSets to run under
- Service – A LoadBalancer allowing ingress to our GO-API pods
- StatefulSet – Provisions 3 replicated pods of our GO-API with 1gb attached storage
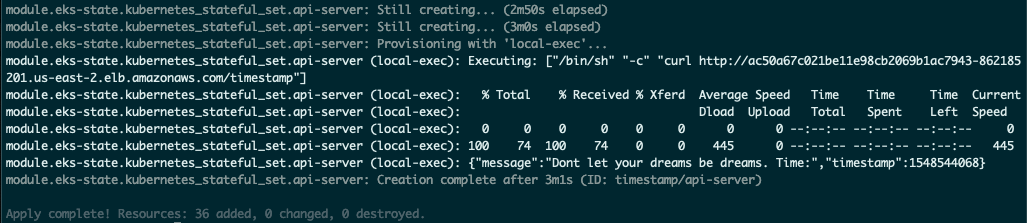
In total 36 actions are applied by Terraform. A curl at the end lets us know immediately the service came up correctly.
We can use aws eks update-kubeconfig --name timestamp-kube to update our kubeconfig so we can inspect our cluster with kubectl

With all this back end infrastructure up, lets take a look at the browser again.
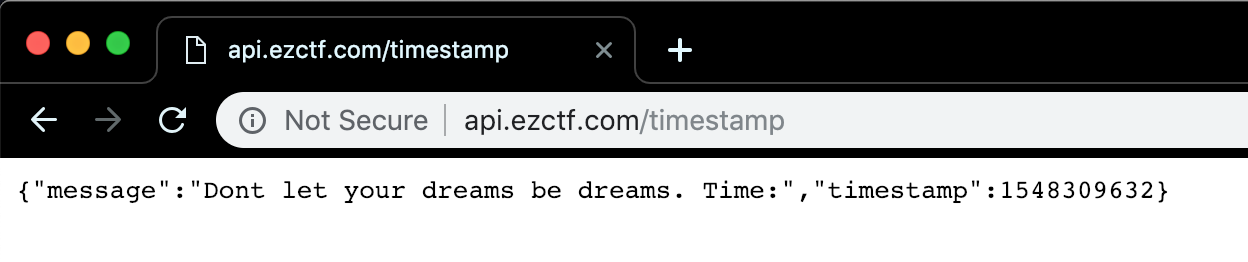
With the api subdomain properly displaying our JSON, the front end should now load.

Success! Our front end and back end have successfully communicated.
With Terraform managing our infrastructure, we are free to focus on our application code. Maybe add a database of motivational messages to pull from and display them in a table.
As an added benefit to this model, updating production code is as easy as just pushing code. Of course you would want to implement a more robust pipeline.
Pushing new React code is as easy as updating the S3 bucket and all we need to push new Golang is to update our container using Kubernetes versioning.
kubectl rolling-update timestamp-v1 timestamp-v2 --image=timestamp:v2
The revision will kick off a rolling update giving our back end continuous integration and delivery with zero downtime. Not to mention rollbacks are easy, just --rollback.
To further expand our Terraform code we could add support for workspace naming and then testing new modules without disturbing our production environment.
Conclusion
Wrapping an eco system of components with high interopability in Terraform allows us to achieve alot in just one command.
That being terraform apply --auto-approve , which in production would be a longer string when ran in a pipeline as you inject env vars or credentials.
This post could’ve been packed with much more but for readability I’m attempting to keep them at a reasonable length.
If you’d like to see the code or make your own changes here it is on my Github. Fair warning, running it will cost you an AWS bill.